Let’s say you’ve completed the bulk of your programmatic SEO strategy—you’ve done the keyword research, you’ve created a list of niches that work within repeatable keyword patterns (maybe these are integrations, use cases, audiences, or locations), and you know what pages you want to create.
Now you need to execute that strategy.
Whatever CMS you’re using, the workflow to implement your strategy and publish pages is going to be very similar. However, programmatic SEO in WordPress does have specific nuances you should be aware of, including certain limitations, recommended tools, and specific processes.
Here’s an overview of the workflow we’re going to discuss, which we’ll do with expert input from the Flying Cat team:
- Create a landing page template
- Create a database for all your niches and variables
- Import the data into WordPress and publish your programmatic pages
- Quality check and update your template
By the end of this article, even without advanced technical knowledge, you’ll understand the following: How to make your programmatic SEO strategy a reality in WordPress, what plugins to use, and how to use AI as part of the process without sacrificing the SEO value of your pages.
Step # 1 Write copy with variables for your landing page template
Your landing page template has to achieve a few key objectives. Though we’re not going to explore all of these in depth, it’s worth summarizing the most important of them before looking at any of the related processes.
Your landing page template needs to:
- Respond to the target audience’s search intent
- Accommodate your long-tail keywords and variables
- Be SEO-optimized following best practices, like the use of metadata and people-centered content
- Be optimized for key metrics like conversion rates (for example, with the use of compelling and strategically placed CTAs)
The specifics of how you manage this content creation will depend on factors like the size of your team and the nature of the content itself. Here’s a look at how we do it at Flying Cat:
- Our SEO strategists follow a detailed process for brief creation. Among other areas, this includes details on the nomenclature, metadata, internal linking, the use of SEO tools like Clearscope, the narrative angle, and key takeaways for the target audience.
- Our writers create an outline for the landing page. This is reviewed by different members of the team for approval.
- Our writers and editors create the landing page copy with post meta. We use Google Docs for this process, but any platform with version control and other advanced editing features is fine.
- This copy is then uploaded as the template that will be used for publishing. Again, what the final template looks like will depend on the search intent, the product, and the niches you’re exploring.
Here’s an annotated programmatic landing page that was created by Zapier. Notice all the different elements that are variables:
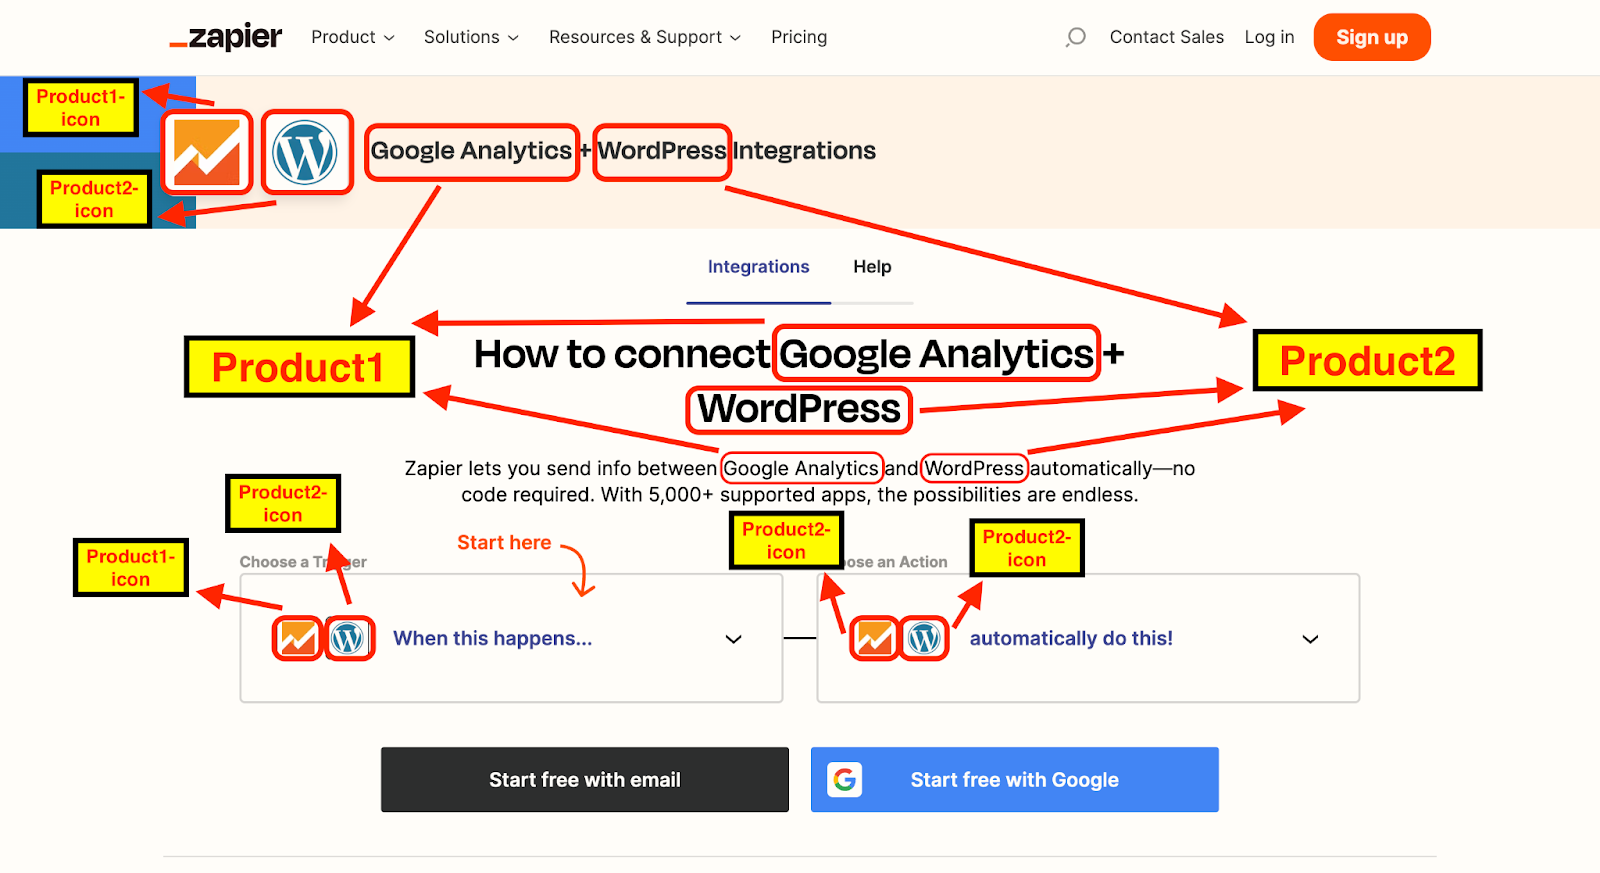
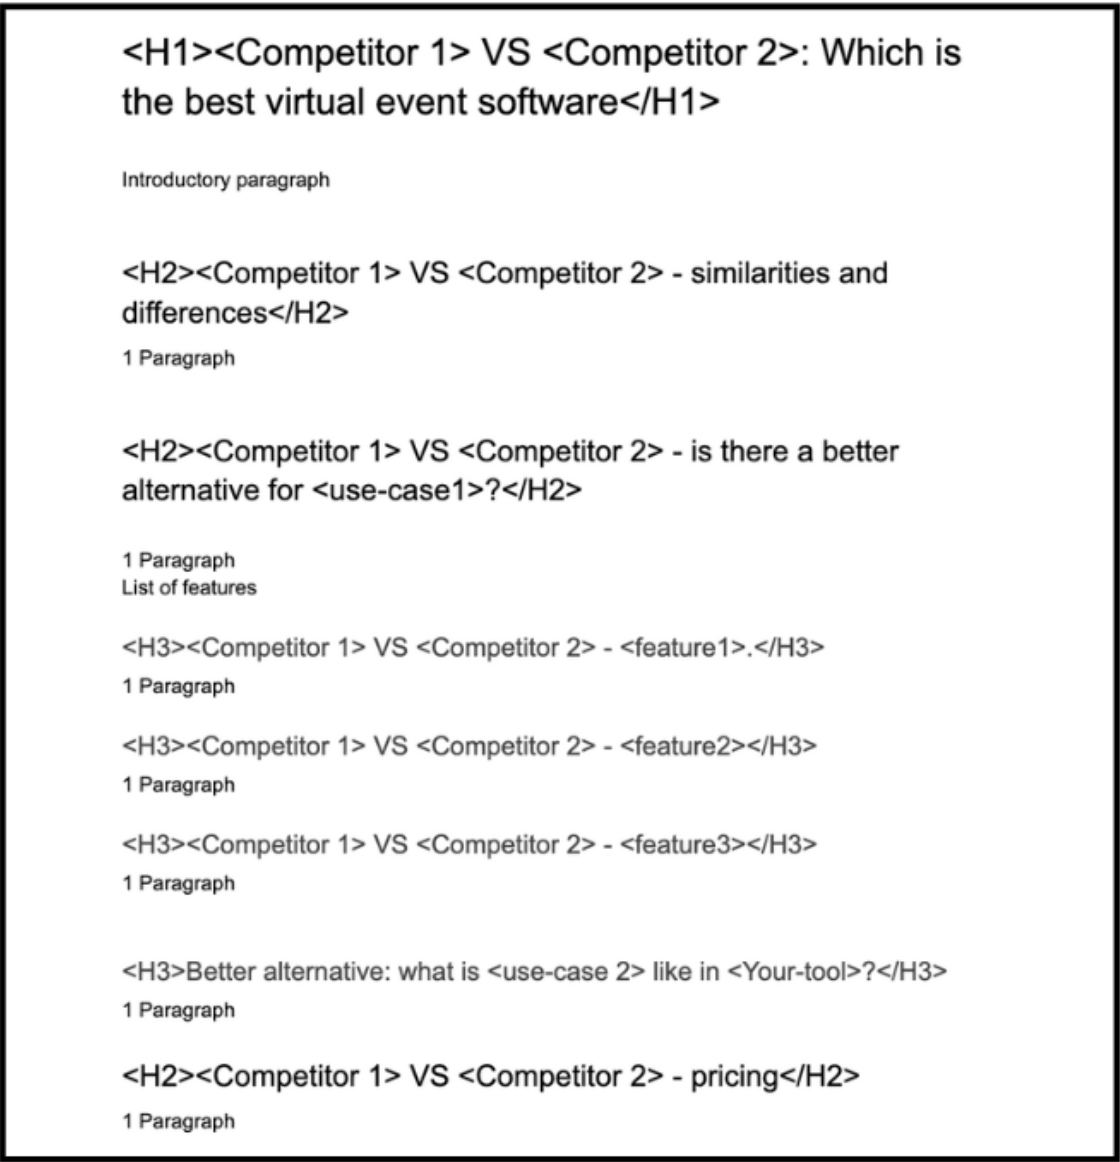
Of course, your template landing page won’t contain the variables themselves, but rather their post meta placeholders.
And here’s an example of what an outline with those placeholders for variable content looks like before any detailed copy is added (as you can see, this is for competitor comparison of virtual event software):
Step # 2 Create the back-end template
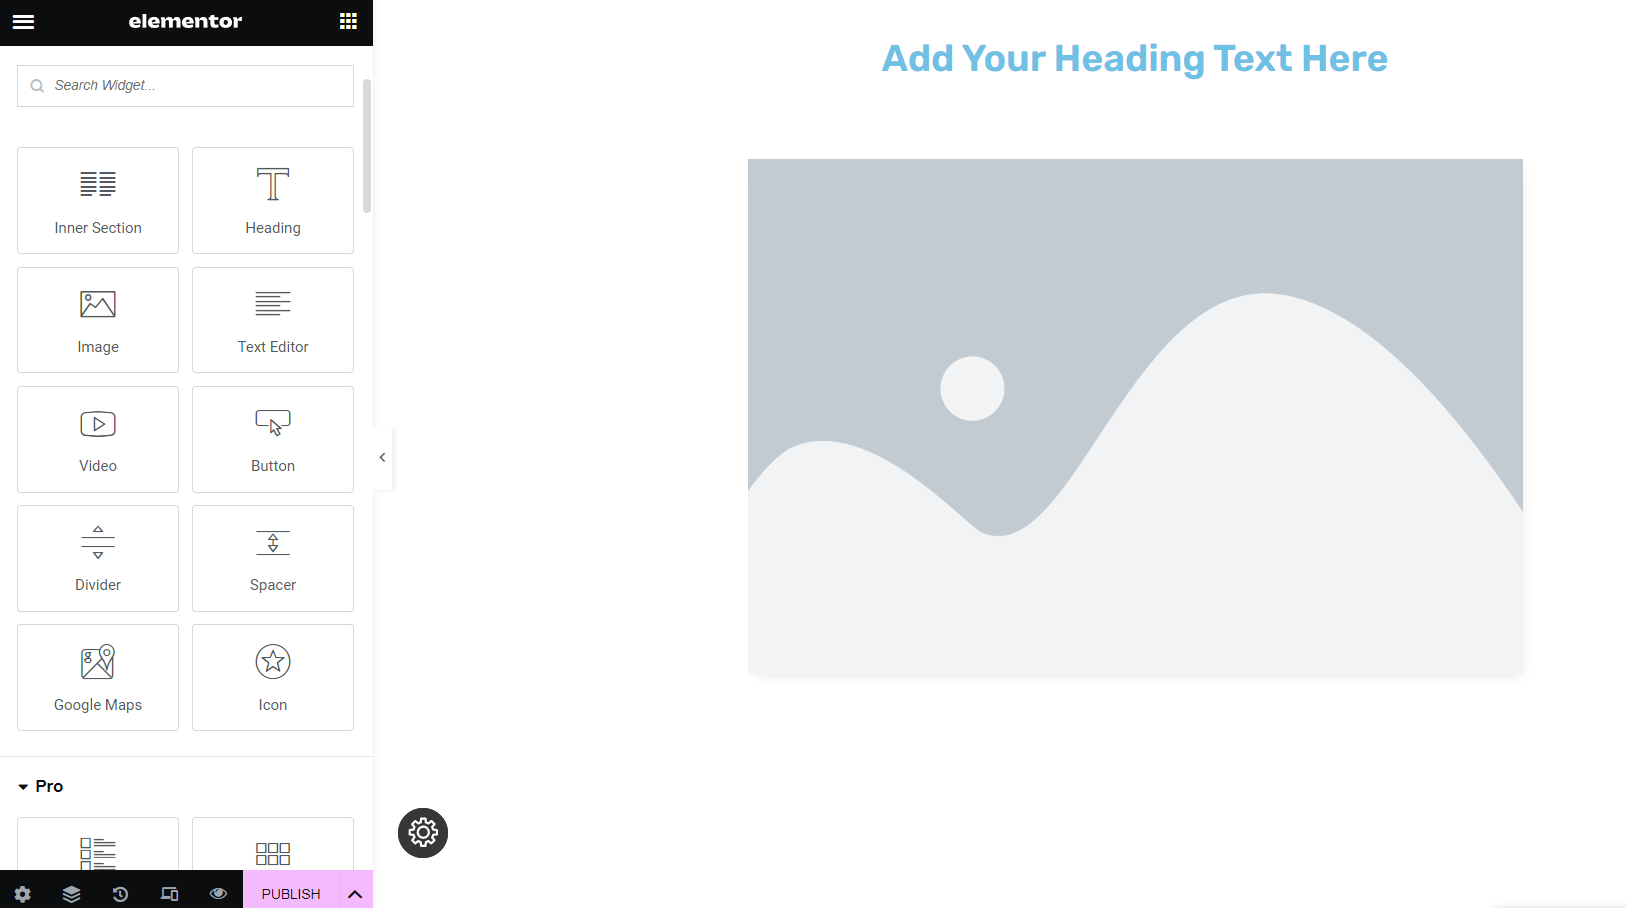
With a view of all the key elements you’ll need for your landing page template, including Hs, images, CTAs, and keyword placeholders, you can build it in the back end of your WordPress site.
At Flying Cat, we usually recommend using the page builder plugins Elementor or Thrive Architect because they give you advanced customization options, including for headers and footers, as well as conversion optimization capability.
Step # 3 Create custom fields for variables with the ACF Views plugin
We recommend using the ACF Views plugin because it saves you from having to write any code.
To use the plugin, you create a container for each variable in your landing page. Through this process, the plugin will eventually be able to pull in data from your database (discussed below). You can read more about it here.
Step # 4 Upload your copy
Those advanced page builders give you a lot of functionality, but not everyone’s a fan—our project manager, Barbara Pereira prefers managing WordPress’s default editor, Gutenburg.
“Honestly, I find Elementor a pain because when you upload copy into an Elementor template, you have to wait—it’s very slow in my experience,” Barbara explained.
“And then the fonts and the formatting need lots of tweaking. For me—not a developer—it’s not intuitive at all. The same for Thrive. Gutenberg, for normal blog posts, is much friendlier.
“My advice? Quality check it. Quality check it very carefully—because it’s easy for small errors to appear. I spend a long time on those checks…” Yeah, sorry about that, Barbara.
Just remember, though, the work you put into your template offers high reward, since it’ll form the backbone of potentially thousands of SEO-optimized pages.
With your template created (thanks, Barbara!), complete with post meta and original copy responding to audience pain points. You need to create the database of variable content that will eventually be imported into WordPress to fill out those placeholders—which takes us to the next step.
Step # 5 Create an information database
Your database will contain all the variables for your programmatic content, and you can create it in a Google Sheet, an Airtable board, or an Excel spreadsheet.
At Flying Cat, we tend to use Google Sheets because that works well with our other strategy and content creation processes, but as long as you can save the data as a CSV file, the choice is yours.
To create the database, you need to:
5a) Fill the first column or columns with all the niche variables
For example, if your niches were based on use cases for a project management tool, Column A might be made up of a list of professions. These will often complete your long-tail keywords.
5b) Fill the first row with the post meta placeholders
These might be different competitor tools, features, prices, or customer goals or challenges.
5c) Fill in the remaining fields with the variable content itself
This is the content that will differentiate the pages from each other. Typically, these fields will provide unique information that’s specific to the niches and their corresponding tools, features, prices, or goals.
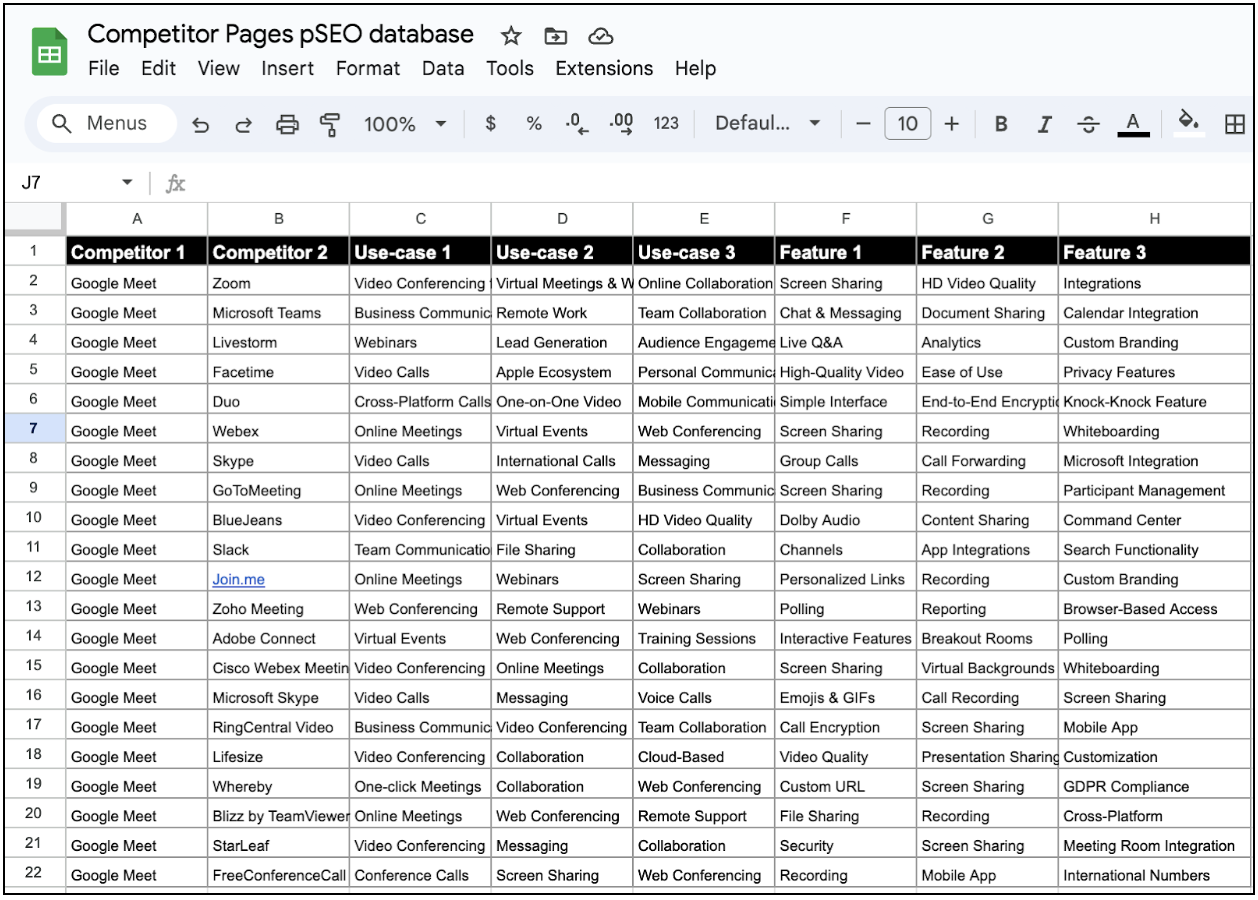
Here’s an example of what a programmatic SEO (pSEO) database looks like. Notice that the first two columns are the niche variables that will complete the primary keywords, Row 1 shows the post data placeholders for the entire template, and all the other fields are the unique variables:
5d) Use AI automation for pSEO content creation
One of the challenges of programmatic SEO is that, if you’re looking to publish hundreds or thousands of pages while maximizing on ROI, you simply don’t have the time or resources to create so much unique content manually.
To counter this, you can use AI for content production based on a complex prompt in ChatGPT.
Here’s Usman Akram, Flying Cat’s head of SEO, explaining how AI-generated content can retain its SEO value:
“Using AI to create variable content at scale is an incredible cost-saver for our clients. Even though it’s AI-generated content, it still draws on our product knowledge and understanding of customer pain points—because it’s bringing in research directly from the Brand Bibles we create for each client.
“So while the insights are AI-generated, they’re still unique—they rely on our expertise, and they’re specific to the audience’s search intent.”
By inputting information about your desired outcome, pSEO details including niche variables and keywords, your TOV, and research on your target audience’s pain points (up to about a dozen of these is typical), you can generate all the remaining data for your database.
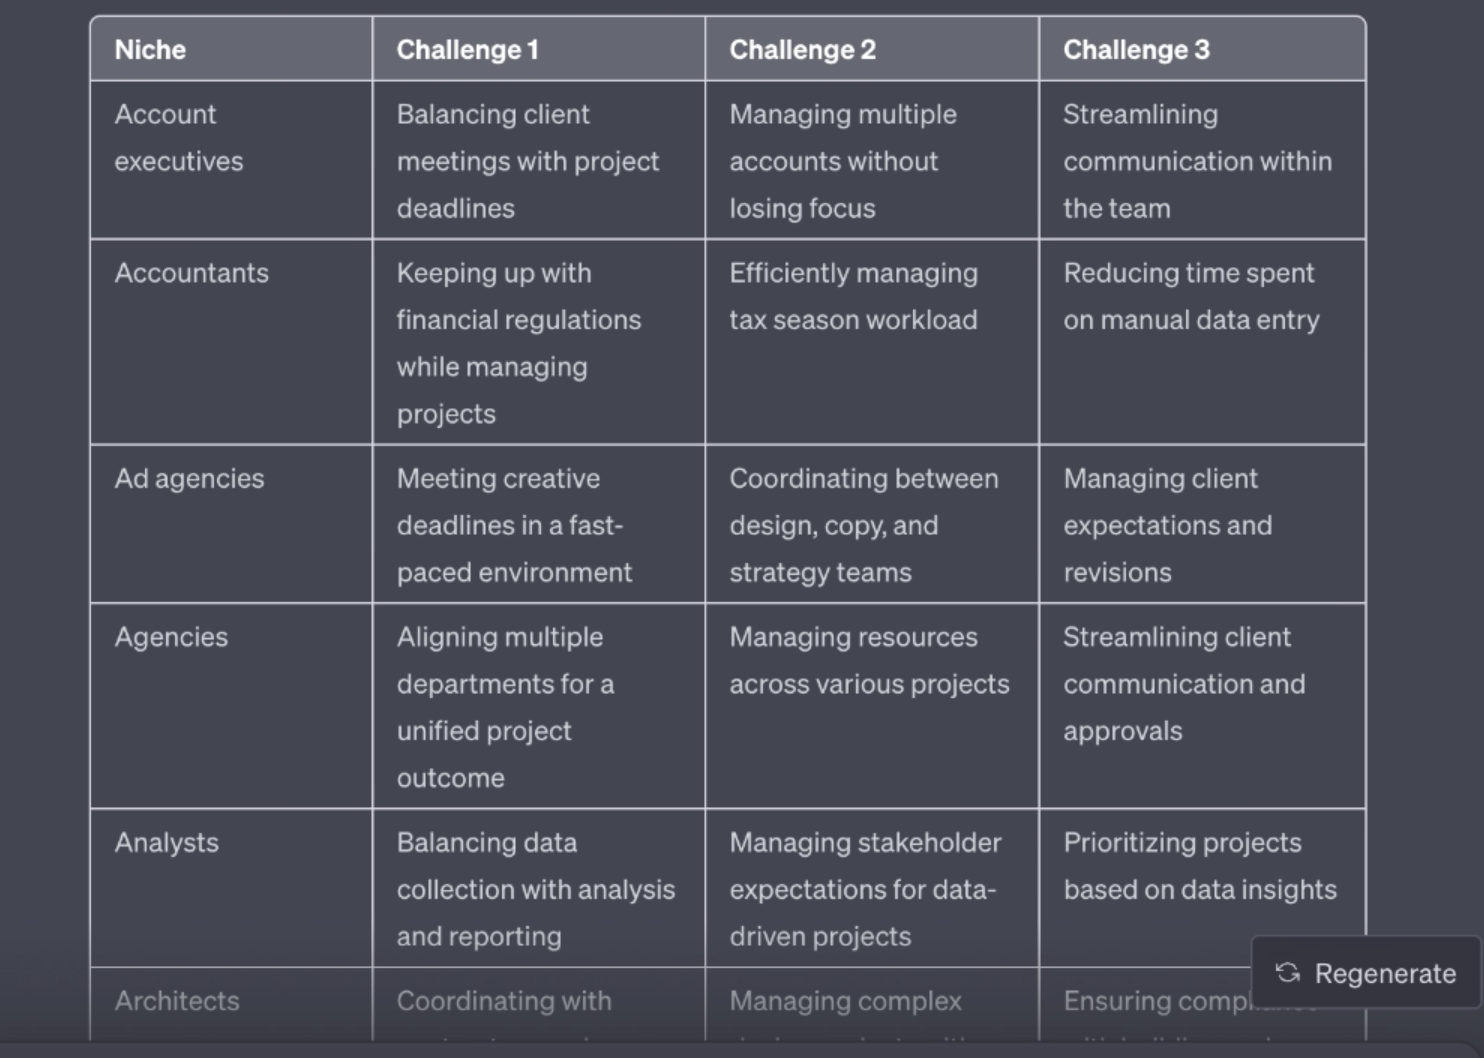
Here’s an example of the AI-generated content you can copy and paste directly into your spreadsheet:
Once you’ve reviewed the database for quality and accuracy, you can get to publishing.
So, save your spreadsheet as a CSV file and start importing everything into your WordPress site, which we look at next.
Step # 6 Use the Multiple Pages Generator plugin to generate your pSEO pages
The Multiple Pages Generator (MPG) plugin allows you to create an unlimited number of webpages in minutes—one for every row of your database.
Once you’ve installed it (search for ‘MPG: Multiple Pages Generator by Themeisle), here’s what you need to do:
6a) Go to the MPG plugin in WordPress and select ‘Create New’

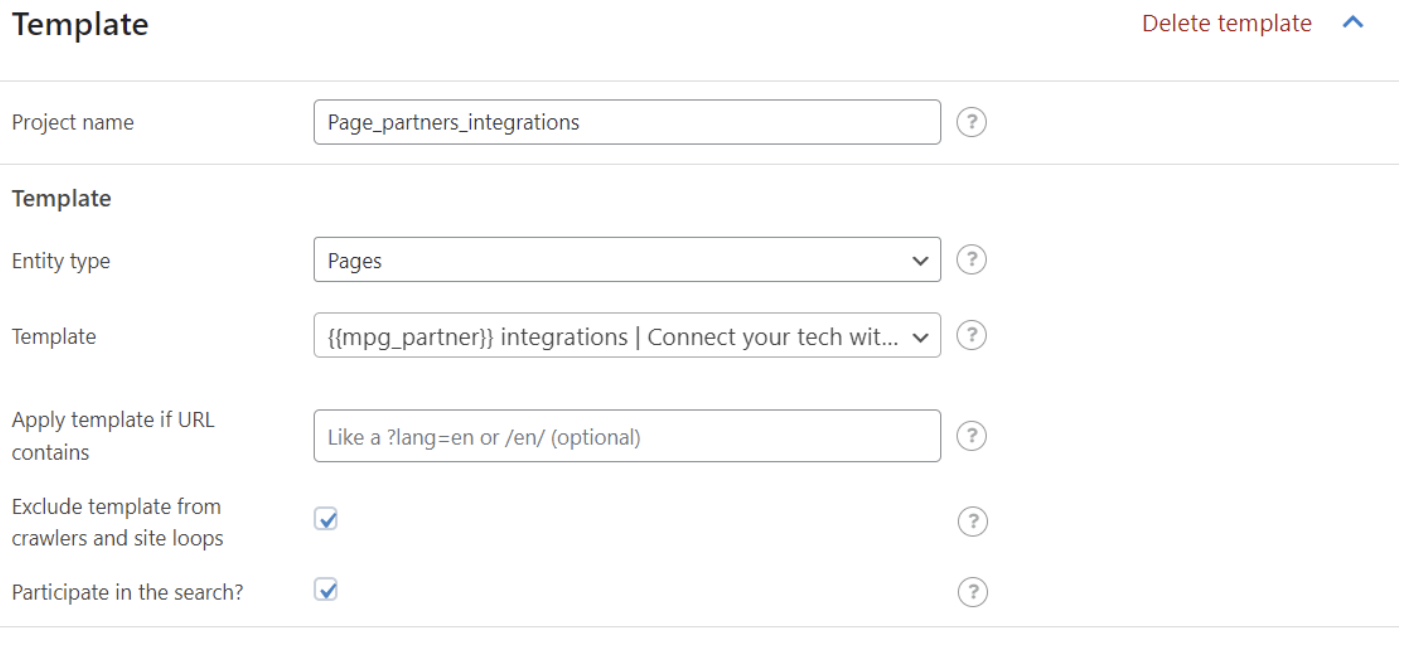
6b) Add the project name and select ‘Pages’ as the entity type
This is so the plugin recognizes your pSEO pages as landing pages, instead of, say, product or translation pages. Select your newly published landing page template, then check the two boxes you can see in the image below to exclude your template from crawlers and for the programmatically created pages to remain searchable.
6c) Upload your CSV file and set the periodicity
This tells the plugin how often to check for updates—if you’re not planning on regularly updating your variables for these published pages, you can just set it to ‘Once’. Also, note that as well as a CSV file, a direct link to an Excel spreadsheet works just fine.

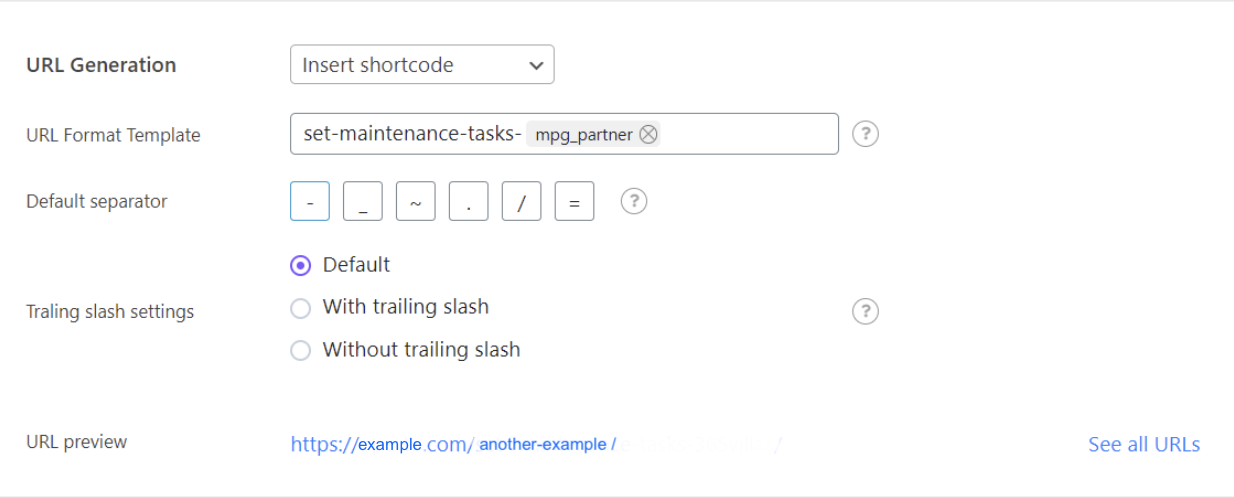
6d) Now add your slug and hit ‘Save Changes’
Congratulations, your programmatic pages are generated.
Step # 7 Check your new pages have correctly published the database variables
All that remains is for you to carry one final quality check to make sure everything has gone smoothly—Barbara insists:
“If you just check two pages, you’ll be able to see that everything has uploaded fine and all the variables match the template. If you spot anything, though, just go into the MPG plugin and make corrections right there. Then, save that updated template and you’re done.”
Step # 8 Modify or add new variables
If you wish to make any changes, all you have to do is update your database and reset the MPG periodicity.
And to carry out more in-depth changes, you just upload a new CSV file and template, repeating the steps we’ve discussed. Then, delete the old template and database from within the plugin.
Maximizing on ROI with pSEO and content creation expertise
As you can see, you don’t need to be technically proficient in WordPress to carry out pSEO.
So, your challenge isn’t to publish tons of content all at once, but to do it with:
a) Pages that rank, and
b) Content that drives engagement and conversions
For this, you’ll need a cutting-edge SEO strategy and journalistic approach to content creation. With those expert pSEO strategists, writers, and editors in place, you can create SEO-optimized pages at scale that broaden, engage, and convert your audience.
- To find out more about how this works in practice, take a look at this programmatic SEO case study where we discuss how the Flying Cat team used pSEO to increase a customer’s conversion rates by 35% in only four months.
