Who has time to publish the content? It can take up to an hour, depending on how long the post is and how many images or other media need to be embedded. But every day that goes by without publishing content that is ready, is another day where it’s not getting results.
Every reliable SEO best practices guide will tell you to publish frequently. Now depending on your content production cadence, you might be spending 10-20 hours per month on uploading content.
Lucky for you, it’s a task that you can also easily delegate. And if you haven’t yet, this is your sign to do it.
Here’s what you MUST include in your content publishing SOP to make sure that when handover that task, the quality doesn’t suffer a single bit.
In this article, you will learn:
- 6 Key components of an effective content publishing SOP, with a focus on the publishing and post-publishing phases.
- How to manage your blog during and after publication for maximum impact.
- Tips for optimizing your content’s reach and engagement post-publication.
Why your content workflow must have a content publishing SOP
Content publishing is a recurring process, often done multiple times a week, and it can be done by anyone who has basic CMS (content management system) skills and doesn’t shy away from being extremely detail-oriented.
So, if you have someone who fits that description (either in-house or you hire a virtual assistant or PM who can take on that task), you can outsource content publishing and free up time for your content team or yourself.
Instead of spending an hour uploading the content piece, that time is spent getting started on a new piece of content or working on your content strategy.
What’s the big deal if I don’t outsource content uploading?
From a business perspective, this SOP enables you to utilize your team’s unique abilities and expertise for what you hired them for, while being able to delegate uploading to a more junior team member.
In the long run, it will let you scale your content production and your business.
6 key components for a solid content publishing SOP
You need a structured approach to be able to publish consistently and manage your content throughout its lifecycle. A Blog Content Publishing SOP provides this structure, ensuring that every piece of content is optimized for maximum visibility and engagement from the moment it goes live and beyond.
Here’s what absolutely needs to go into your Standard Operating Procedure (SOP) for content publishing.
1. Determine Your Content Publishing Schedule
Like I mentioned above, uploading can take up to one hour per content piece. And while uploading a new post on exactly the same day every week is not the winning metric, continuously publishing fresh content is.
But that doesn’t mean that being organized and having a designated day for uploading content can be massively helpful for all stakeholders involved in your content workflow. Defining the uploading day in your content calendar helps align with the rest of the marketing and social media team.
So note down when the uploading day is so the person can block that time in their calendar and get to some distraction-free uploading.
2. Provide log-in to CMS and style guide
The SOP should point the person to where they can find the log in credentials and which email address they can access the CMS from. Never post the actual log in credentials inside the SOP, but keep a tab on who to reach out to should there be issues with the log in.
This helps avoid people from being stuck at step one of the uploading process, and gives them information to be able to solve this issue themselves.
Also link to the CMS style guide. If you don’t have one yet, your uploading style guide should include:
- How to format pull quotes
- How are SMEs (Subject Matter Experts) quotes
- How do you display CTAs
- Is there a table of content in the website design or does it have to be added manually
- How do you embed videos, infographics and other media in your blog posts
- What does the featured image usually look like?
- Any other special notes regarding your blog design
3. Record a loom of doing it once
Either hop on a training call (and record it!) while you let the person shadow you while you upload a piece of content, or record yourself uploading a piece of content once using software like loom.
While a written SOP is helpful, some people do better with taking in information when it’s visual. Plus, that will be a helpful asset if you need to delegate the uploading task to someone else.
4. Checklist with non-negotiables to do while uploading content
Sloppy uploading can negatively affect your SEO results.That’s why I highly recommend to include a checklist of items that need special attention when uploading:
- Slug: Words in the URL are a ranking factor (although a very light-weight one) and help with user experience. That’s why it’s really important to update the slug to what the strategist has defined in the brief.
- Meta description: It’s the short, relevant summary that shows up in the Google search. It’s the pitch to click on the search result, so to say. In general, this is defined by the writer and strategist to make sure the meta description (and title) are as relevant as possible to the search. If you don’t set it manually, it will usually default to the first paragraph of your blog post.
- Meta title: Same as the meta description, make sure you upload the title intended by the content strategist.
- Alt Image description: adding this not only helps search engine bots to understand the image content, but foremost helps visually impaired people understand what the image shows and appears on a page when the image fails to load.
When uploading content, you want to make sure that what the strategist had envisioned when working on your content marketing strategy has translated perfectly onto the published piece.
While adding alt image description to every image you upload, double-and triple checking the H2s are actually H2s can seem like a time-sink, these are actually some of the most underrated steps in the content workflow. I already wrote about that when speaking about the 6 non-negotiable steps to any content management workflow.
5. Add a checklist for QA once the piece is published
Once the new content is published, it doesn’t stop there. Doing a quality assurance check on the published post is unchallengeable. These are the items that need to be checked:
- Are the lists numbered correctly?
- Do all links work?
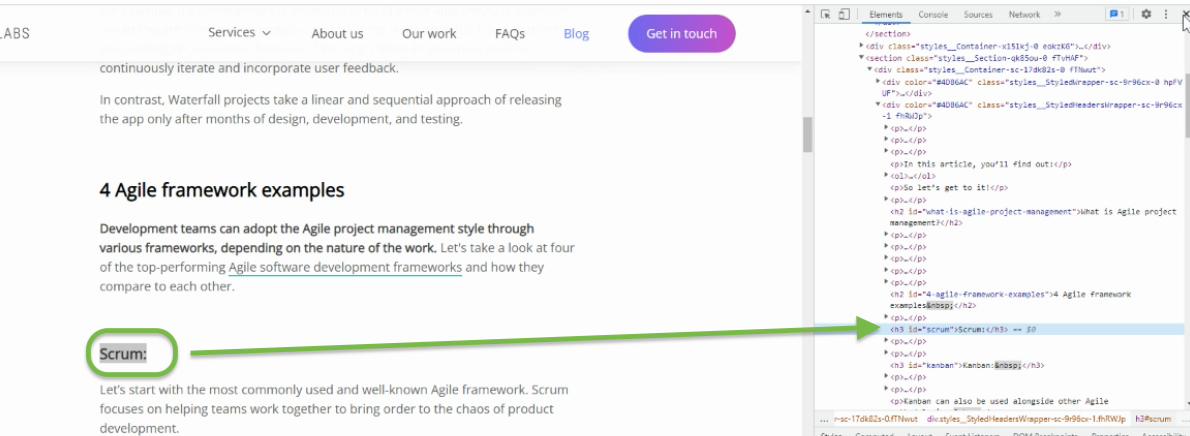
- Assure that all headings ( H1, H2s and H3s) display as intended
- Check desktop and mobile display
- Ensure all multimedia elements are correctly formatted and embedded
- Place internal links to the newly published post
- Make sure external links open in a new tab

6. Post-publishing tasks in content marketing
Make sure your SOP includes these following steps that will give your content a little booster to be indexed sooner:
- Submit to the URL manually to Google Search Console for faster indexing. Here’s how to do that:
- Loop in the marketing team: Let them know the content is now published so they can use it in their distribution strategies across social media, email newsletters, and other channels.
- Share the newly published post in your network
What about automating content publishing?
We’ve tried. I spoke with Barbara and Sasha, our Project Managers who are in charge of uploading all the content for our clients. Content being uploaded automatically from google docs to WordPress, Contentful or any other content management system is THE dream.
They have experimented with plugins and services, and we even copied a so-called “tried and tested” Zap that helps upload content to WordPress automatically.
But something always failed. Especially when the clients uploading needs are all different (remember the list I shared above about the blog style guide?). We realized we needed the same amount of time to proofread, check and fix the automatically uploaded content, as it did to just manually upload it.
Pair this with having to get permission from the client to install a plugin…and we’re facing a situation where we’ve made a hot mess out of a recurring, simple publishing process.
It goes without saying though, if you have found a way to automatically upload content, please share!
Ship fast & optimize your SOP on a regular basis
As for any SOP, the motto must be “ship fast & optimize”. Get the SOP done as fast as possible. The sooner you have it, the sooner you can delegate the task.
Regularly update your SOP based on insights gathered from the team: does the SOP have everything to do the task? Is it outdated? Is there a faster/better way to perform the task?
Further publishing and uploading tasks that need an SOP
Here are more tasks that you can easily delegate to someone else, possible the same person who is already uploading your content and familiar with your CMS:
- Update all content where the title includes the year (e.g Best guide for SEO tactics in 202x).
- When optimizing your content, some content pieces might only need a better title and a fresh meta title and description. It’s a time-intense task to go through a long list of blogs that need to be optimized. If you have your operations-mind on, it will automatically shout: delegate!
- Get support for your internal linking strategy and link relevant blog topics from and to each other.
Get an SOP and start scaling your content production
Having a content publishing SOP empowers you to delegate a more junior task so you can focus on content strategy or other more senior tasks needed to build your business.
You’ll be able to delegate this task without sacrificing the quality or needing to compromise on your blog design.
Make sure the SOP covers all the necessary steps from uploading the high-quality content to post-publishing tasks to make sure your content gets indexed fast.
